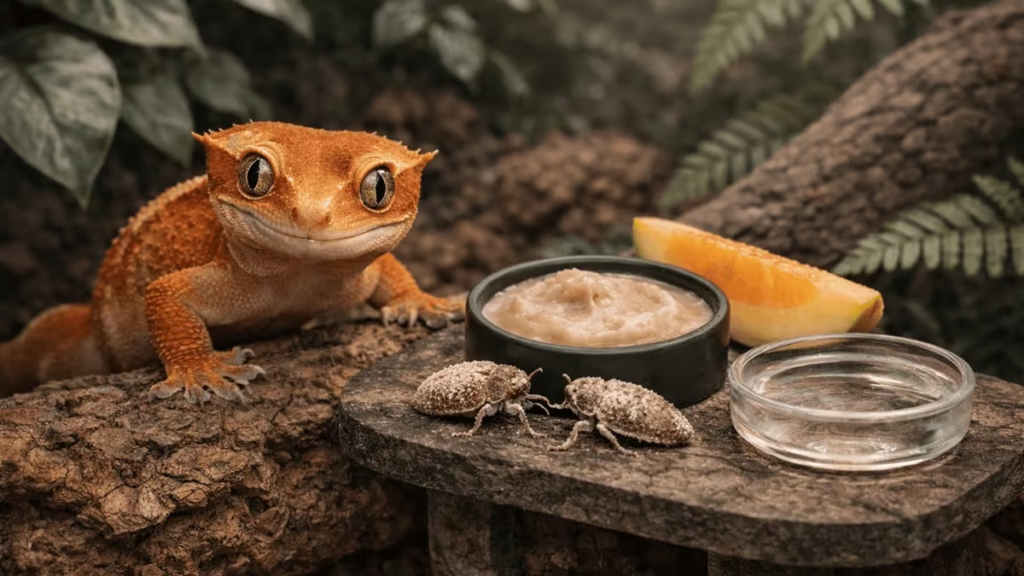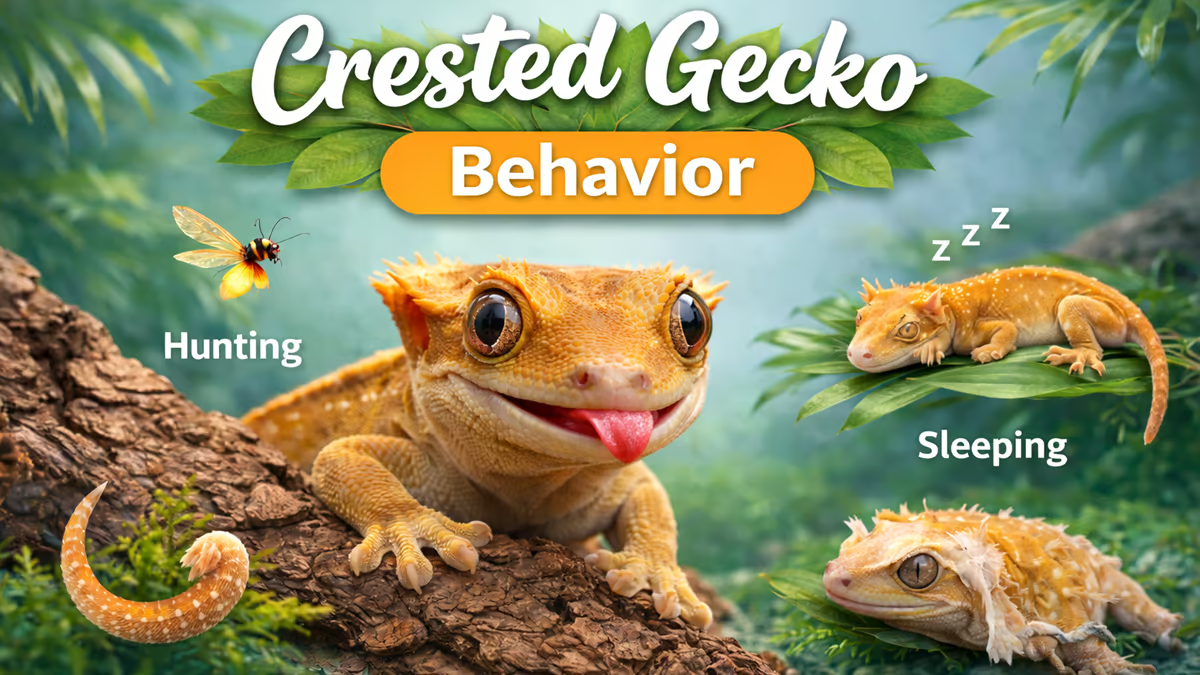

Your new crested gecko is settled in their temporary container, staring at you with those big curious eyes. You know you need to get the crested gecko enclosure right before they move in for good. But every forum thread sends you somewhere different, and you’re not sure who to trust.
Get five core things right — size, temperature, humidity, lighting, and substrate. Your gecko will thrive for 15-20 years.
Let’s set this up properly.
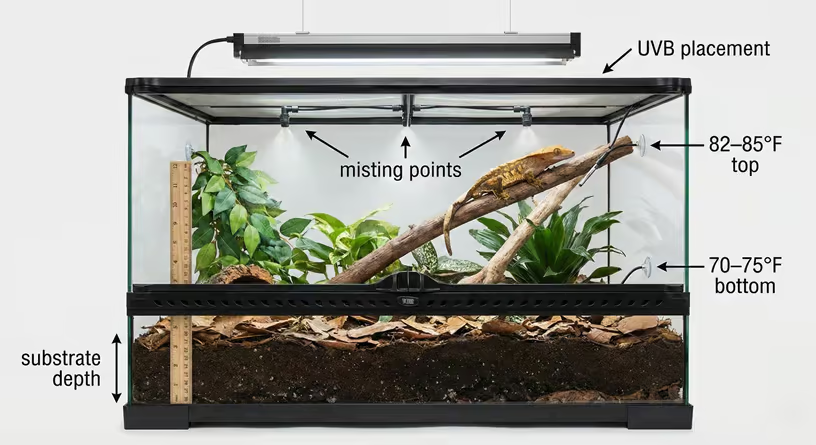
A proper crested gecko enclosure is a tall, front-opening glass terrarium with 18″×18″×24″ minimum dimensions for adults. Keep the top zone at 82–85°F and the bottom cool zone at 70–75°F. Maintain 60–80% humidity using daily misting with a wet/dry cycle, and provide a low-output UVB bulb on a 12–14 hour photoperiod. Substrate should be 2–4 inches of coco coir or peat moss for moisture retention.
In this guide, you’ll learn:
- What equipment to gather before you start building
- How to choose the right enclosure size for your gecko’s life stage
- How to build the enclosure step by step in the correct order
- How to set up temperature zones, humidity, and UVB correctly
- How to choose safe substrate and furnishings
- What problems to watch for after setup is complete
Understanding Crested Gecko Biology: Why Their Habitat Matters So Much
Crested geckos are tropical, arboreal reptiles native to the island of New Caledonia in the South Pacific, a humid, forested environment with relatively mild temperatures. According to ReptiFiles’ crested gecko care research, this origin shapes every single habitat requirement your crestie has.
They’re crepuscular (most active at dawn and dusk) and spend their lives climbing through tree canopies and low shrubs. That means they move vertically more than horizontally, they need shade and leaf cover during the day, and they depend on the natural humidity cycle of tropical rainfall rather than constant moisture.
What does that mean for your enclosure? Height matters more than floor space. Humidity must rise and fall — not stay soaked 24/7. And temperatures should stay moderate, never hot. These geckos can’t handle desert-level heat like bearded dragons. Their comfortable range is actually close to typical room temperature, which is one reason beginners love them.
One thing worth understanding early: crested geckos can’t regulate their own body heat. They’re ectotherms. If their enclosure doesn’t provide a temperature gradient, their metabolism slows down. Digestion suffers. Appetite drops. A lot of keepers blame illness when the real culprit is a setup that’s just slightly too cool or completely uniform in temperature.
What You Need Before You Start: Complete Equipment Checklist
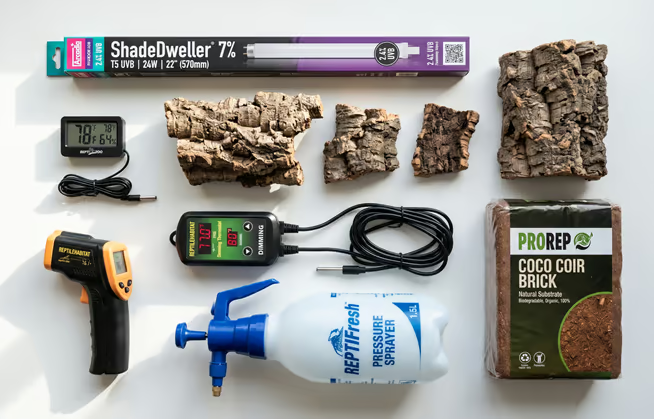
Before touching your enclosure, gather everything on this list. Running out of equipment mid-setup means your gecko waits longer in a temporary container and you skip important steps. Get it all ready first.
Essential Components for Setup:
- ✅ Front-opening glass terrarium — 18″×18″×24″ minimum for adults
- ✅ 25–40W halogen or incandescent bulb — for the warm upper zone
- ✅ Dimming thermostat — mandatory, never run heat without one
- ✅ Low-output UVB bulb — Arcadia ShadeDweller 7% T5 or equivalent
- ✅ Outlet timer — for automatic 12–14 hour photoperiod
- ✅ Infrared thermometer gun — to verify actual surface temperatures
- ✅ Digital hygrometer — to monitor humidity accurately
- ✅ Coco coir or peat moss — 2–4 inches depth for substrate
- ✅ Cork bark pieces — minimum three, at different heights
- ✅ Diagonal climbing branches — bamboo, grapewood, or driftwood
- ✅ Live or artificial plants — pothos recommended for beginners
- ✅ Pressure sprayer — for daily misting
- ✅ Small water dish — shallow, for supplemental hydration
Got everything? Good. Now let’s build your enclosure in the right order.
Stage 1 complete. You understand what crested geckos need and have your equipment ready. Next: choosing the right enclosure size.
Choose the Right Tank Size by Life Stage
The right gecko enclosure size changes as your gecko grows, and starting too large can actually cause problems for tiny hatchlings who struggle to find their food.
Here’s what the research tells us, broken down by life stage:
| Life Stage | Weight | Minimum Dimensions | Ideal Dimensions | Key Considerations |
|---|---|---|---|---|
| Hatchling | Under 10g | 12″×12″×12″ | 12″×12″×18″ | Smaller space helps find food |
| Juvenile | 10–25g | 12″×12″×18″ | 18″×18″×18″ | Add more hides and climbing branches |
| Adult | 25g+ | 18″×18″×24″ | 18″×18″×36″ | Height prioritized over floor space |
| Two adult females | 25g+ each | 18″×18″×36″ | 24″×24″×48″ | One extra hiding area per gecko |
Data compiled from ReptiFiles care research and multiple exotic reptile husbandry sources.
Height is the priority. Crested geckos travel upward more than sideways. That said, don’t make the enclosure a narrow tower. They also hop and leap horizontally as they explore and thermoregulate, so some floor depth matters too.
A quick note on cohabitation: I strongly recommend housing crested geckos individually unless you’re an experienced keeper actively breeding them. Two males housed together will fight. Males with females lead to constant breeding stress. Even two females can develop dominance issues over time. It’s just not worth the risk.
Stage 2 complete. You’ve chosen the right enclosure size. Next: picking the right enclosure type before you start building inside it.
Glass vs. Screen Enclosure: Which Actually Works for Crested Geckos
This is one of the most common questions beginners ask, and it matters a lot for your crested gecko habitat. The short answer is that front-opening glass enclosures outperform full-screen enclosures for this species in nearly every practical way.
Here’s why.
| Feature | Glass Front-Opening | Full-Screen Enclosure |
|---|---|---|
| Humidity retention | Excellent | Poor — moisture escapes constantly |
| Temperature stability | Good | Difficult, especially in cool rooms |
| Misting frequency needed | Daily | 2–3x daily minimum |
| Cleaning access | Easy (front door) | Stressful for gecko (top opening) |
| Viewing quality | Excellent | Good |
| Cost | Moderate to high | Low to moderate |
| Best for crestie? | ✅ Yes | ⚠️ Not ideal |
Full-screen enclosures like the ReptiBreeze were built for species that need intense airflow, chameleons, for example. Crested geckos need humidity retention. You’ll spend your entire day re-misting a screen enclosure just to stay in the 60–70% range.
Glass with a partial mesh top gives you the best of both. Good airflow to prevent stagnant air and respiratory issues, while retaining the moisture your gecko needs. Front-opening doors also mean you approach from the side (far less stressful for your gecko) rather than from above like a predator.
DIY enclosure keepers often use PVC builds or modified wooden vivariums. These work fine if they’re sealed properly against moisture. Just make sure any wood is sealed with reptile-safe, waterproof coating. Unfinished wood absorbs moisture, grows mold, and warps quickly.
Stage 3 complete. Your enclosure type is chosen. Now it’s time to build inside it step by step.
Step-by-Step Habitat Build Order
This is the section most care guides skip entirely. They cover every individual topic but never tell you what to do first, second, and third. Build in this exact order and you won’t miss anything critical.
Step-by-Step Setup Guide:
- Lay your substrate first. Pour 2–4 inches of coco coir or peat moss evenly across the entire base. If you’re doing a bioactive build, lay your drainage layer (leca balls), mesh barrier, then substrate mix in that order before anything else goes in.
- Place your cork bark hides. Position one hide near the bottom cool zone and one near the upper warm zone. Add a third at mid-level. Your gecko needs a safe hiding spot at every height before they move in.
- Install your climbing branches. Position diagonal branches so they connect the bottom cool zone to the upper warm zone at varying angles. Your gecko uses these to thermoregulate by traveling up or down.
- Add your plants. Place live or artificial plants at multiple height levels, especially mid and upper zones. An empty tank causes chronic stress no matter how perfect the temperatures are — dense foliage is what actually fixes that.
- Mount your UVB bulb above the mesh top, positioned 8–12 inches above the highest basking branch. Plug it into your outlet timer set to a 12–14 hour photoperiod.
- Position your heat bulb directly above the highest perch or branch. Connect it to your dimming thermostat. Never plug a heat bulb directly into the wall — always through the thermostat.
- Verify your temperature gradient with an infrared thermometer gun before your gecko goes in. Confirm the top zone reads 82–85°F and the bottom cool zone reads 70–75°F. If temperatures are off, adjust bulb wattage or position now.
- Mist the enclosure fully on the first evening. Target 70–80% humidity on your digital hygrometer. Let it fall naturally overnight and check it in the morning — this is your baseline for the wet/dry cycle going forward.
- Introduce your gecko. Place them gently inside, close the door, and leave them alone for 7–10 days minimum. Put food out each evening. Resist checking on them constantly while they map their new territory.
Essential Pro Tips:
- Aim for at least one branch within 8–12 inches of the UVB bulb. That’s your gecko’s primary basking perch — get this one spot right and the rest of the setup matters less.
- If your thermostat probe and your infrared gun give different readings at the same spot, trust the infrared gun. It measures actual surface temperature where your gecko sits, not ambient air
- Skip handling entirely for the first week even if your gecko looks settled — what looks like calm is usually stillness from stress. Let the territory-mapping process complete fully before your first interaction.
- Check temperatures at three different times: Morning, afternoon, and evening before introducing your gecko. Temps can shift significantly as your room warms and cools through the day.
That’s the complete build sequence. The sections below go deeper into each element so you understand exactly why each step matters and how to dial in the details correctly.
Stage 4 complete. You have the full build sequence. The sections below explain each element in detail so you can get every setting exactly right.
How to Set Up Your Temperature Gradient Correctly
Here’s something that surprises a lot of new crested gecko keepers. These geckos do need a temperature gradient. Many old care guides said crested geckos are “room temperature” lizards that need no heating at all. Technically, that’s possible if your room stays 72–78°F consistently. But in practice, a mild heat source makes a measurable difference in appetite, digestion, and activity.
According to ReptiFiles’ crested gecko temperature research, the target thermal zones are:
- Top of enclosure (basking zone): 82–85°F — this is where climbing activity happens
- Bottom of enclosure (cool zone): 70–75°F — resting and retreat area
- Nighttime drop: 65–72°F — this is normal and actually beneficial
One hard limit: never let temperatures exceed 85–86°F. Unlike desert reptiles that can handle 110°F basking spots, crested geckos are genuinely heat-sensitive. Consistent exposure above 85°F causes stress, appetite loss, and in severe cases, heat stroke. This isn’t a guideline. It’s a hard limit.
For heating, a low-wattage halogen or incandescent bulb (25–40W) positioned at the top of the enclosure works well. Always use a dimming thermostat to keep the top zone from overshooting. Verify temperatures with an infrared temperature gun, not the cheap stick-on thermometer strips (those measure glass temperature, not the actual zone your gecko inhabits. The difference can be 8–12°F).
Skip heat mats. They’re designed for belly heat in terrestrial species, not arboreal geckos who spend their lives off the ground. They don’t create the vertical gradient a crested gecko needs and can cause substrate hot spots.
Reptile Habitat Specialist Pro Tips:
Temperature Placement
What most keepers don’t realize: verify temps at the spot your gecko actually uses — the top perch or branch — not just the air temperature at enclosure height. Mount your probe thermometer at the level where your gecko sleeps during the day. If your thermostat reads 82°F but the perch where they’re resting is 88°F, you’ve got a problem only an infrared gun will catch.
Humidity Cycle
The wet/dry humidity cycle is not just about misting schedule — it’s actively protective. Constant high humidity above 80% for extended periods creates the perfect environment for respiratory infections. Let humidity drop to 40–50% between mistings before spraying again. This mimics the natural rainfall-and-dry pattern of New Caledonia’s tropical forests.
Night Heating
If your room temperature drops below 65°F at night, add a ceramic heat emitter (CHE) on a thermostat set to around 68°F. CHEs produce heat without light, so they won’t disrupt your gecko’s night cycle. Never use a red or blue “night light” bulb — crested geckos can see these wavelengths and it stresses their natural rhythm.
Stage 5 complete. Temperature gradient is set and verified. Next: dialling in your humidity cycle.
How to Control Humidity: The Wet/Dry Cycle That Actually Works
Humidity is where most beginners either go too low (gecko gets stuck sheds, dehydration) or too high (mold growth, respiratory infections). The sweet spot for your crested gecko habitat is maintaining a wet/dry rhythm rather than a constant level.
Target ranges:
- After misting: 70–80% (nighttime spike)
- Between mistings (ambient): 50–60%
- Minimum before re-misting: 40–50%
Mist the enclosure once or twice daily. Ideally in the evening when your gecko is becoming active. Use a pressure sprayer rather than a standard spray bottle. It covers the enclosure more evenly and saves your hand during daily misting. Lightly mist the glass walls and plant leaves. Your gecko won’t drink from a standing dish most of the time. They prefer to lick water droplets off surfaces, just like they’d drink from dew in the wild.
Monitor humidity with a digital hygrometer (not analog. Analog gauges drift off calibration quickly). Place it mid-enclosure, not right next to the glass wall where condensation can give a false high reading.
Substrate choice heavily influences how well you can maintain this cycle. Coco coir and peat moss absorb moisture and release it slowly, which helps buffer humidity between mistings. This is much more effective than bare paper towels, which dry out instantly and provide zero humidity support.
If you live in an especially dry climate, a partial cover over the mesh top (a piece of glass or foam board covering 50–70% of the mesh) can help retain moisture without eliminating airflow entirely.
Stage 6 complete. Humidity cycle is running correctly. Next: setting up UVB lighting and your photoperiod timer.
How to Set Up UVB Lighting for Your Crested Gecko Enclosure
You’ll find two camps on UVB for crested geckos. The older camp says it’s unnecessary since crested geckos are nocturnal and can get D3 from quality diet. The current research-backed camp says low-output UVB provides measurable welfare benefits even for crepuscular species.
The modern consensus, supported by ReptiFiles and reptile lighting researchers, is that a low-output UVB source is beneficial and worth providing. Crested geckos are classified as Ferguson Zone 1 animals. They receive only incidental UV in the wild, filtered through dense canopy. They don’t need the intense UVB output of a desert lizard. But zero UVB creates long-term D3 dependency on supplements alone, which isn’t as reliable as natural photosynthesis.
Furthermore, clinical care protocols published by LafeberVet for exotic reptiles emphasize that while crested geckos are crepuscular, access to low-output UVB significantly improves their calcium metabolism and prevents long-term bone density issues.
What to use:
- Arcadia ShadeDweller 7% T5 is the most commonly recommended option (or equivalent low-output T5 UVB bulbs)
- Target UVI 1.0–2.0 at the basking branch if you have a Solarmeter 6.5
- Without a Solarmeter, mount at roughly 8–12 inches above the basking zone through mesh
- Replace T5 UVB bulbs every 12 months (or every 6 months for compact/coil types), even if they still produce visible light (UVB output degrades before the bulb burns out)
Photoperiod matters as much as UVB intensity. Aim for 12–14 hours of light during warmer months and 10 hours during winter months. This seasonal variation helps regulate your gecko’s circadian rhythm, appetite cycle, and overall health. A simple outlet timer makes this completely automatic.
If you’re not using UVB lighting, commit to high-quality supplementation (calcium with D3) and accept that you’ll need to monitor your gecko more closely for signs of deficiency like soft jaw, limb deformities, or lethargy.
Stage 7 complete. UVB and photoperiod are set. Next: choosing and laying your substrate correctly.
What to Put at the Bottom of the Tank
Your substrate does more than sit at the bottom of the tank. It holds humidity, supports beneficial microbial activity in bioactive builds, and provides a naturalistic surface for your gecko to occasionally descend to.
|
Substrate |
Safety |
Humidity Retention |
Maintenance |
Cost |
Best For |
|---|---|---|---|---|---|
|
Coco coir (compressed) |
✅ Safe |
Excellent |
Monthly replacement |
Low |
All setups |
|
Peat moss |
✅ Safe |
Excellent |
Monthly replacement |
Low |
Tropical naturalistic |
|
ABG mix (bioactive blend) |
✅ Safe |
Excellent |
Spot clean only |
Moderate |
Bioactive builds |
|
Paper towels |
✅ Safe |
None |
Replace every few days |
Very low |
Hatchlings, quarantine |
|
Sphagnum moss (top layer) |
✅ Safe |
Very good |
Refresh monthly |
Low |
Layering with coco coir |
|
Sand |
❌ Avoid |
Poor |
N/A |
Low |
Not appropriate |
|
Gravel/pebbles |
❌ Avoid |
Poor |
N/A |
Low |
Not appropriate |
Sources: ReptiFiles substrate research; exotic reptile husbandry guidelines.
For most beginners, coco coir alone or mixed with peat moss at 2–4 inches depth is the easiest starting point. It’s affordable, holds humidity well, and is easy to spot-clean.
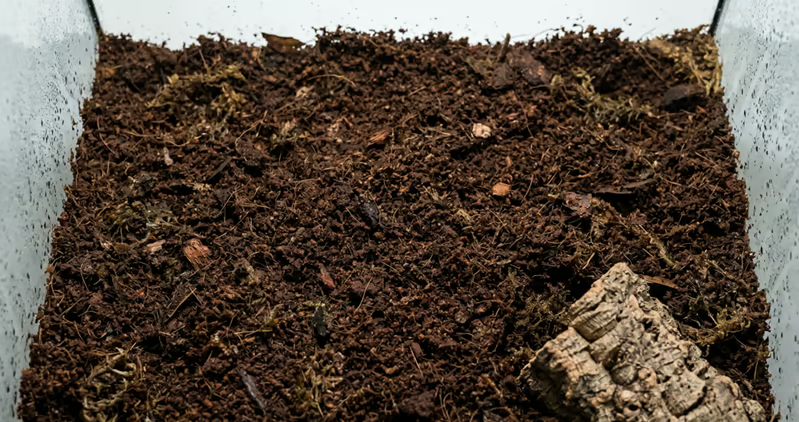
For a bioactive crested gecko enclosure, you’ll want a drainage layer at the base (leca balls or hydro balls), a mesh barrier to separate drainage from substrate, then 3–4 inches of ABG mix or a coco coir/peat/sand blend on top. Layer live sphagnum moss on the surface. This kind of setup supports live plants, isopods, and springtails that break down waste naturally. It takes more setup time but means far less cleaning long-term.
Hatchlings under 10g are better off on paper towels or a very thin layer of coco coir. Loose substrate poses a minor impaction risk for tiny geckos that might accidentally ingest it while feeding. Once they’re over 10g and eating reliably, you can transition to a naturalistic substrate.
Stage 8 complete. Substrate is laid. Now add the hides, branches, and plants that make the enclosure feel like home for your gecko.
How to Furnish Your Enclosure: Hides, Climbing Branches, and Plants
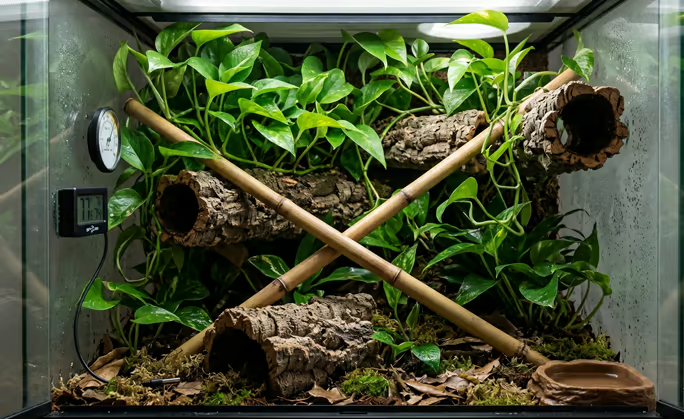
Crested geckos are active climbers and need a well-furnished enclosure to express natural behavior. Think vertical layers. Your goal is to fill the height of the enclosure with things to climb on and hide in.
Cork bark is one of the best investments for a crested gecko setup. Curved cork tubes make excellent hides at multiple levels, cork flat pieces create climbing walls, and the natural texture gives your gecko excellent grip. It also looks great and holds humidity.
Live or artificial plants fill two roles: humidity retention and hiding spots. Your gecko will spend much of the day tucked inside or behind dense foliage. Safe live plants include pothos, snake plants (Sansevieria), bromeliads, ferns, and dracaena. Pothos is nearly indestructible and grows quickly, making it the top choice for beginners building a live plant setup.
Avoid toxic plants. Pothos has a mild irritant sap but is generally considered safe for reptiles. Avoid ivy, philodendron (different from pothos), and any plant that’s been treated with pesticides.
Climbing branches — bamboo sticks, grapewood, or driftwood should be positioned at multiple heights and angles. Your gecko won’t walk in straight lines. They want to hop from perch to perch, change angle and height frequently. Diagonal branches connecting the bottom cool zone to the upper warm zone are especially good because they let your gecko thermoregulate by simply traveling up or down.
🌊 Real-World Scenario
I consulted with a beginner keeper whose 8-month-old crested gecko was hiding constantly, barely eating, and refusing to climb. The keeper had an 18″×18″×24″ glass enclosure, good size but with just two small fake plants and one piece of bark. The enclosure had great temperatures and humidity. The gecko was simply stressed by the lack of cover.
We added three more cork pieces at different heights, a large pothos plant, and two diagonal bamboo branches connecting the levels. Within three days, the gecko was visible and active every evening, exploring all three height zones. Within two weeks, appetite was back to normal. The enclosure hadn’t changed in size or climate. It just needed to feel like a jungle instead of an empty box.
Stage 9 complete. Your enclosure is fully built and furnished. The section below covers what problems to watch for once your gecko is settled in.
Common Setup Failures and How to Fix Them Fast
Even well-intentioned setups can go wrong after your gecko moves in. These are the most common crested gecko enclosure problems keepers notice in the first weeks — and exactly how to fix each one.
Humidity Constantly Too Low
Cause: Full-screen enclosure, or mesh top with no partial cover, in a dry climate.
Fix: Cover 50–70% of the mesh top with a piece of glass or foam. Switch to coco coir substrate (adds humidity buffering). Add live plants. If you’re misting twice daily and still dropping below 40%, your enclosure just isn’t sealing enough. Consider switching to a glass front-opening terrarium.
Temperature Stuck Too Uniform
Cause: No heat source, or bulb positioned at the wrong end of the enclosure.
Fix: Position your heat bulb directly above the highest perch or branch. This creates the warm top zone. Let the bottom naturally drop to the 70–75°F cool zone without supplemental heating there. Verify the gradient exists with an infrared thermometer at both levels before adding your gecko.
Gecko Never Seen, Refuses to Come Out
Cause: Usually a furnishing issue (not enough hides and cover), less often a stress response to top-entry access or a tank that’s too empty.
Fix: Add more cork bark hides at multiple height levels. Include at least one hide in the warm zone and one in the cool zone. Dense plants at mid and upper levels are key. If you have a top-opening aquarium, strongly consider upgrading to front-opening. Approaching from above mimics a predator and causes chronic stress for arboreal geckos.
Stuck Shed on Toes or Eyes
Cause: Humidity too low during shedding, or no humid hide available.
Fix: During active shedding (you’ll notice dull, almost silvery skin), increase misting frequency temporarily and add a small humid hide packed with damp sphagnum moss. A 24-hour humidity spike of 75–80% usually resolves stuck shed. For stuck shed already on the toes, gently soak the foot in warm water for 5–10 minutes before attempting to remove it.
Enclosure Maintenance Schedule
- Mist enclosure once or twice — target 70–80% humidity
- Remove uneaten food from the previous night
- Check temperature gradient with infrared gun
- Confirm hygrometer reading is in range
- Rinse and refill shallow water dish
- Spot-clean substrate — remove visible waste
- Wipe inside glass walls with damp cloth
- Inspect cork bark and branches for mold
- Check thermostat probe placement and accuracy
- Observe gecko for weight loss or skin changes
- Full substrate replacement (non-bioactive setups)
- Deep-clean hides and branches with reptile-safe spray
- Trim or repot live plants if overgrown
- Refresh top layer of sphagnum moss if used
- Recalibrate digital hygrometer accuracy
- Replace UVB bulb annually (T5 tube type) or every 6 months (compact/coil type) — output degrades before visible failure
- Full enclosure deep-clean with reptile disinfectant
- Inspect all electrical equipment and thermostat wiring
- Reassess enclosure size if gecko has grown
- Schedule exotic vet wellness check
- Burning smell from heating equipment
- Scorch marks near the bulb fixture or enclosure rim
- Heat lamp sparking, buzzing, or making unusual sounds → Unplug immediately, move your gecko to a safe temporary container, do not attempt to fix yourself
- Gecko with blistering, discoloration, or raw patches on skin (thermal burn from unregulated heat)
- Basking zone consistently reading above 86°F (exceeds safe limit) → Contact an exotic vet immediately; lower temperatures to safe range
- Persistent lethargy or complete appetite loss for 7+ days despite correct temperatures
- Open-mouth breathing, mucus, or clicking sounds (respiratory infection from humidity issues)
- Weight loss combined with inactivity
Crested Gecko Enclosure Setup Checklist
- ☑ Enclosure is minimum 18″×18″×24″ (adults)
- ☑ 2–4 inches of coco coir or peat moss substrate laid
- ☑ Three cork bark hides at low, mid, and high levels
- ☑ Diagonal climbing branches connect cool zone to warm zone
- ☑ Dense plant cover at mid and upper levels
- ☑ Heat bulb connected through dimming thermostat
- ☑ Top zone verified at 82–85°F with infrared gun
- ☑ Cool zone verified at 70–75°F
- ☑ UVB bulb mounted 8–12 inches above basking branch
- ☑ Photoperiod timer set to 12–14 hours
- ☑ Digital hygrometer placed at mid-enclosure
- ☑ First misting done, humidity reached 70–80%
Frequently asked Questions
Key Takeaways from This Crested Gecko Enclosure Setup Guide
Setting up a proper crested gecko enclosure really comes down to five things done consistently well: the right dimensions (at least 18″×18″×24″ for adults), a gentle temperature gradient (82–85°F top, 70–75°F bottom), a wet/dry humidity cycle (misting to 70–80%, letting it drop to 40–50% before misting again), appropriate low-output UVB lighting on a 12–14 hour photoperiod, and coco coir or peat moss substrate at 2–4 inches depth.
You don’t need a perfect setup on day one. Start with the basics, observe your gecko’s behavior, and adjust from there. Active exploration at dusk, visible climbing, clean sheds, and steady appetite. Those are your signs that you’ve gotten it right.
What part of your crested gecko enclosure setup are you working on? Drop your questions in the comments below.
This article is for informational purposes only and is not a substitute for professional exotic veterinary or certified vivarium designer advice. Every crested gecko has unique needs based on age, health, and individual variation. Always consult a qualified exotic veterinarian before significant enclosure changes, especially if your gecko shows signs of thermal stress, respiratory issues, or abnormal behavior. Article reflects current husbandry understanding as of 2026. Author assumes no liability for improper equipment installation or enclosure modifications.
Information reflects current understanding as of July 21, 2026
Elias Thorne designs bioactive vivarium setups for exotic reptiles, with 12+ years building humidity, UVB, and climate control systems. His environmental systems engineering background shapes his approach to enclosure design. He writes Petwikia’s enclosure and habitat guides.